
Phone (): +49 36483 761-0
Telefax: +49 36483 22368
info@2k-leuchten.de
http://2k-leuchten.de
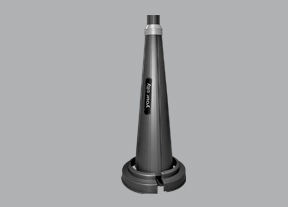
1. Put the drilling jig on the foundation and drill a hole of 22 mm. The drill hole has to be at least 170 mm (minimum). Clean the drill hole with compressed air or a round steel wire brush.
2.Put the mortar injection cartridge into the dispenser gun and press until (about 2 full strokes or an about 10 cm long strip of mortar) the discharged injection mortar is coloured evenly in a grey colour. Do not use this first mortar strip for assembly.
3. Anchor rod has to be put in a rotating movement up to the anchor depth markings by hand within the processing time (1 min when 30°C). The anchor rod is properly set when excess mortar seeps from the hole. If no mortar becomes visible on the concrete surface, pull out anchor rod, let mortar cure, drill out hole and start again.
4. Cure time is 20 min when ambient temperature is 20° to 30°c.
5. Put profile poles with gussets plates above the anchor rod on the concrete foundation and screw on the M 20 nuts including washer (no picture).
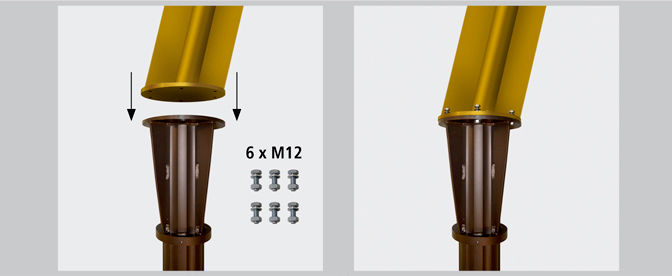
6. Mount V-extension arm with 6 units of M 12 screws. The extension arm is secured with safety nuts on the bottom part of the flange.
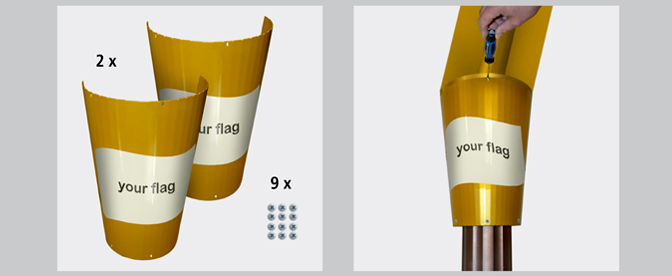
7. Screw on decorative covers 2 parts with flag on the connecting part of profile pole and V-extension arm.
8. Pull cable through the pole base part and fasten with 4 units of fastening screws on the back of the luminaire.


9. Fit the luminaire with cable on the extensions arm and secure with screws (no picture).
10. Connect ground cable and perform a function test (no picture).
11. 4 Pole base covers per pole, of which 2 have your town written on them, which have to be mounted 180° offset. One cover has the mark 2K on it - this has to mounted above the door opening of the profile pole.
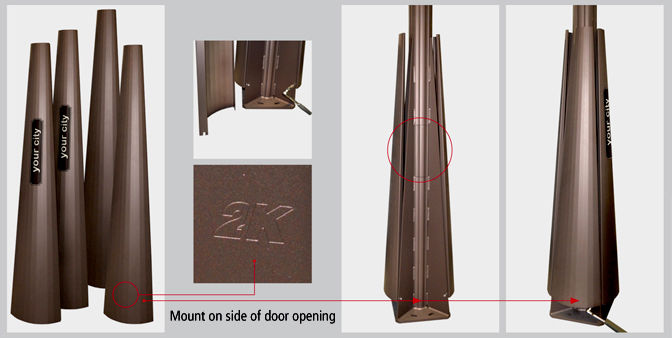
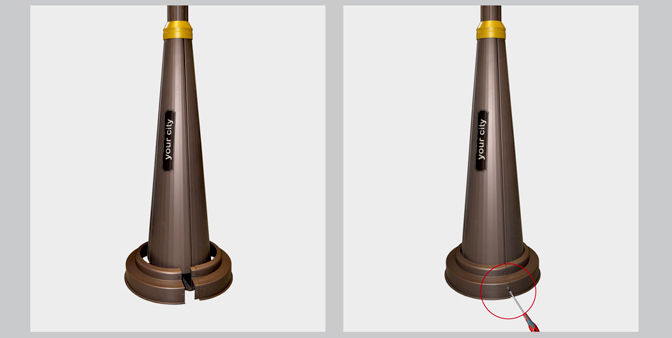
12. The final part of the pole cover consists of two aluminium die cast half shells. Those are simply put together according to the existing geometries, put over the pole cover, and fastened with one screw.
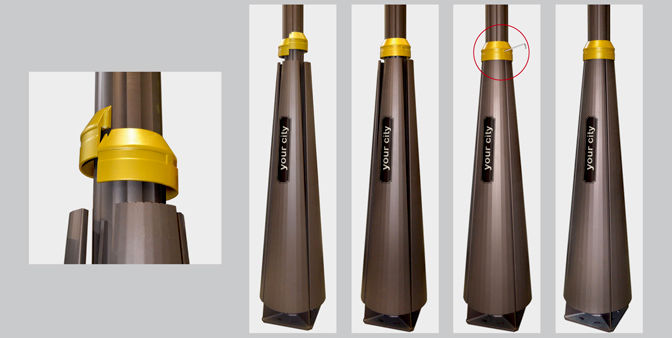
13. The base finish of the lighting pole consists of two sheet metal half shells, which are fastened on the predetermined positions.
Find suitable lamp base under the category Street Lights / Model Group LED Street Lights / Series Golf 1 and Series Golf 2:
Link to Series Golf 1
Link to Series Golf 2
Find suitable lighting poles and order number under the category lighting poles / Series extruded aluminium profile poles Golf:
© 2K Moxa Lighting GmbH, Gewerbegebiet 31, 07381 Moxa/Thüringen
Quelle: http://2k-leuchten.com/Assembly_Instructions_Lighting_Pole_Series_Golf